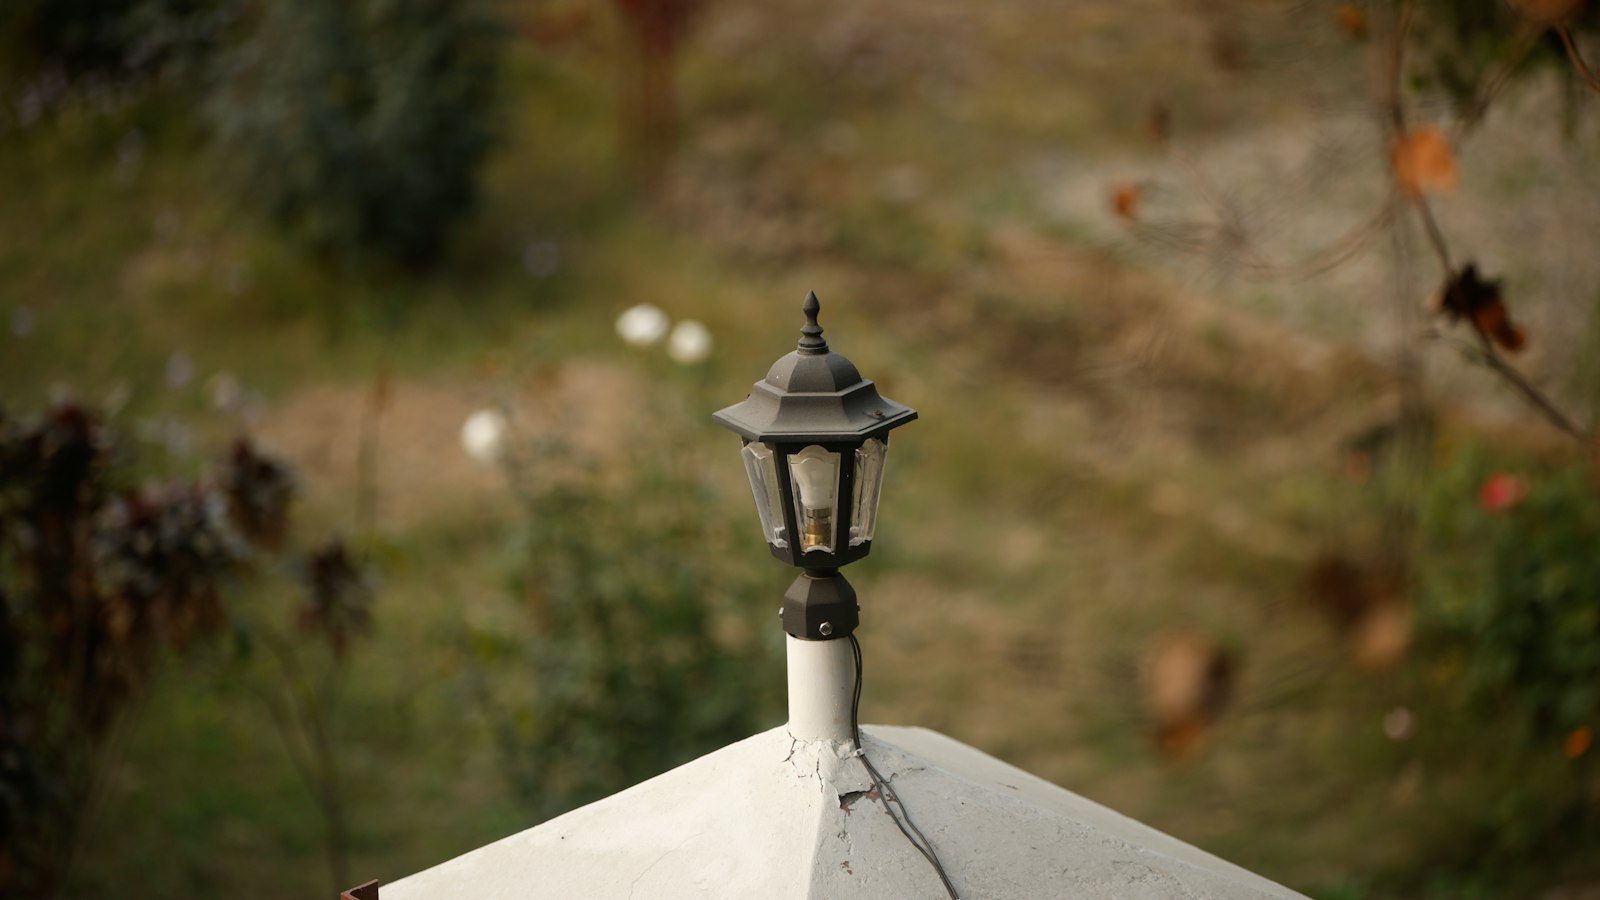
On a new villa, the gate lantern is easiest to get right while the pillar is still brick. If the architect picks the head from the cast aluminium gate lights range before the mason casts the cap, the cap width, the cable exit and the plaster can all be built around that fitting. Once the pillar is plastered and painted, the electrician has to work with whatever top the mason left.
This note follows one build from the drawing to fixing day. For a pillar that is already finished, start with the tape method in pillar size to lantern size. Homeowners picking a style can read how to choose a gate light.
What the header photo shows
The pillar at the top of this page is a stock photograph, not one of our fittings. The cap rises to a peak, so the lantern stands on a thin plastered stub with no flat seat around it. The supply cable leaves the side of that stub and runs down the slope in the open, where it takes sun and rain every day. The plaster has already cracked at the joint between stub and cap.
Those are masonry decisions, made long before a light arrives, and at that stage each fix costs a length of pipe and a few minutes with a level.
One villa, five site stages
Take a composite brief (not a named client): a white two-storey villa with a pair of gate pillars, an architect who wants matte black post-top heads, and a contractor starting the boundary wall next month.
-
On the drawing
Choose the code before the cap is drawn
The architect picks a post-top model from the 2026 catalogue PDF and reads its height × width in inches off the product page, where a millimetre line sits alongside. The cap is then drawn to suit that footprint, with a margin of plaster visible around the base so the head looks seated on the pillar. Both pillars get the same cap dimension, so the two heads read as a pair from the road. If the elevation changes later, the multi-size gate families let the same look move up or down a size.
Matte black is the usual pick on a flat contemporary elevation like this one. It shows road dust sooner than an antique wipe, and the client should hear that while the drawing is still open. If wall lights will sit on the boundary near the gate, mark their centres on the same sheet using wall lantern mounting height and keep them in the pillar finish.
-
Brickwork
Run the cable up inside the pillar
While the pillar rises, the electrician lays a conduit through its core and leaves the cable end at the centre of the future cap. The supply then stays out of sight and out of the weather, and nobody has to cut a groove through fresh plaster later. Cable size and the switch point are site wiring for the electrician to decide, and we don't specify them.
-
Casting the cap
Ask the mason for a flat, level top
A post-top lantern needs a seat it can stand on squarely, at the width on the drawing. A peaked or domed cap forces a stub or a spacer, as in the photo, and the joint around that stub is where hairline cracks open and water gets in. A slight weathering fall at the outer edge is fine when the centre stays flat.
Before the cap cures, photograph it with a tape laid across the top and WhatsApp that photo with the code. We check the head against that seat before the lot is packed, which is far cheaper than finding a mismatch on fixing day.
-
Plaster and paint
Finish the pillar before the light goes on
Plaster and paint come first. A lantern fixed early collects cement splash and paint drips, and scrubbing set cement off a powder coat risks marking it. Keep the cartons closed in a dry store until the painters have left. The new white plaster is also the reason the body is cast aluminium, since iron can leave rust streaks down a pillar after a few wet seasons (see aluminium vs iron outdoor lights).
-
Fixing day
Seat, connect and check the door
The carton carries the wiring diagram, the base plate dimensions and the fixing hardware. The electrician centres the base over the cable exit, fixes it to the flat cap and connects at the holder, which is B22 unless the quote names another. Before leaving, open and close the door once to confirm it seats on its full lip and that the latch came through transport straight.
The bulb ships only when the quote line includes it. At a gate we suggest warm white, between 2700K and 3000K.
If the cap is already built
Measure the cap you have, keep the tape in the photo, and choose the size that seats on it from pillar size to lantern size. If the top is peaked like the one in the header, say so in your first message, because the right head then depends on how the electrician will create a flat seat. A shape the catalogue doesn't carry can be cast to order from your sample on a fifty-piece run, explained in custom replica from a sample.
Packing for a site that is still under construction
On a live site the gate heads may sit in a store for weeks while the painters finish. Empty cast housing and complete glass and LED ship as separate lines, and the trade differences are set out in empty housing or glass and LED. Whichever you choose, keep the doors latched in storage so the glass doesn't take dust from the brickwork.
Frequently asked questions
- When should the gate lantern be chosen on a new villa?
- Before the mason casts the pillar cap. With the post-top code on the drawing, the cap can be built flat at the width of the lantern base, and the electrician can bring the cable out at its centre.
- Can a post top lantern light stand on a peaked pillar cap?
- It needs a flat, level seat. On a peaked or domed cap the lantern ends up on a stub or spacer, and the plaster joint around it tends to crack and let water in. If your cap is already peaked, say so in the first message and we will suggest a head for the seat your electrician can build.
- Does a two-pillar villa gate get trade pricing?
- A pair of gate lights is a retail order, since one to five pieces go at list price. Trade pricing starts at 10 pieces, which fits a developer using the same gate design across a project. See the gate lights range for codes.
What to send the trade desk
One message is enough to start: the model code or a screenshot from the catalogue, the cap width in inches as drawn, a line saying the pillar is still under construction, the finish, empty housing or glass and LED, how many pillars, and your city and pincode. A single villa with two pillars falls in retail, which covers one to five pieces at list price. A developer repeating the same gate across a project gets a trade quote once the lot reaches 10 pieces. Quotes are in INR from the works in Aligarh, with packing and GST added and transport quoted separately. The About page and the shipping page have the detail.
WhatsApp +91 70176 62533 or email padmaenterprises55@gmail.com, ideally while the cap is still a line on the drawing.